Challenge Overview
Challenge Overview
This is a learning challenge to help you get familiar with EpiServer, it will be beneficial for the upcoming real challenges. No prize is available in this project.
Episerver is an online, commercial website creation tool written using the Microsoft technology stack, ASP.NET. Episerver is one of the most powerful website content management systems (CMS) in existence today.
Many of the world's top brands use Episerver to power their websites, companies include Gatwick Airport, Prezzo, Marie Curie, Legoland, Pizza Hut Restaurants, TalkTalk, Virgin, Reebok, Renault, and AXA.
Episerver is easy to use for content editors and has an easy interface for developers to interact with it. After your website has been built, you don’t need to be an internet expert or a developer to create flexible web pages using Episerver.
Episerver provides the tools for a successful website. Episerver not only provides a CMS solution for your website but it also provides extra modules that can be integrated easily to add quick enhancements to your website. These modules include forms, e-Commerce, Marketing automation, Social, Analytics. More information about this is here.
It is worth getting started and learning Episerver!
Requirements for this challenge
The requirement for this challenge is simple:
(1) Set up the development environment and install a sample site (Alloy site).
(2) Do basic editing for the sample site, it includes
-
Make simple changes to the format and appearance of the home page.
-
Create a page that requires authentication.
You don’t need to write any single line of code.
1. Set up the development environment and install a sample site
Before starting, you need a Windows 10 machine.
Then install the latest Visual Studio 2019 (Community Edition is good). You need to install the NuGet as well, while you are installing Visual Studio 2019.
Once you get the Visual Studio 2019 installed ready, follow the steps below to install Episerver and create the demo project.
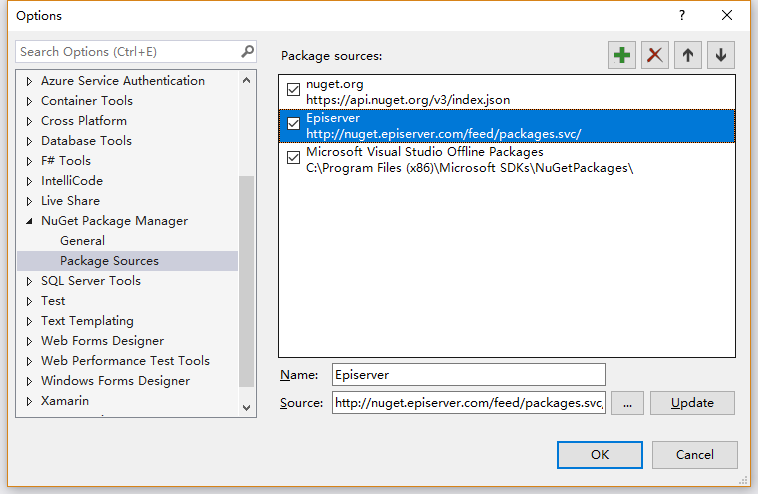
Step 1: Set-up the Episerver NuGet Feed
In Visual Studio, click Tools -> Options and navigate to the 'NuGet Package Manager -> Package Sources' tab. In Visual Studio click Tools -> Options and navigate to the 'NuGet Package Manager -> Package Sources' tab.
Click the '+' icon and at the bottom add in Episerver as the name and for the package, the source uses this URL:
http://nuget.episerver.com/feed/packages.svc/
Click 'Update' and you're down. In NuGet you should now see an EPiServer tab in the Online section that allows you to browse a number of EpiServer related functions.
Step 2: Install Episerver CMS Visual Studio Extension
In Visual Studio, click Extensions -> Manage Extensions and search “Episerver” in the pop-up dialog. Then install it. The installation will start after you close the Visual Studio.

Step 3: Create a demo project
In Visual Studio, click File -> New -> Project, and search “Episerver” in the pop-up dialog.
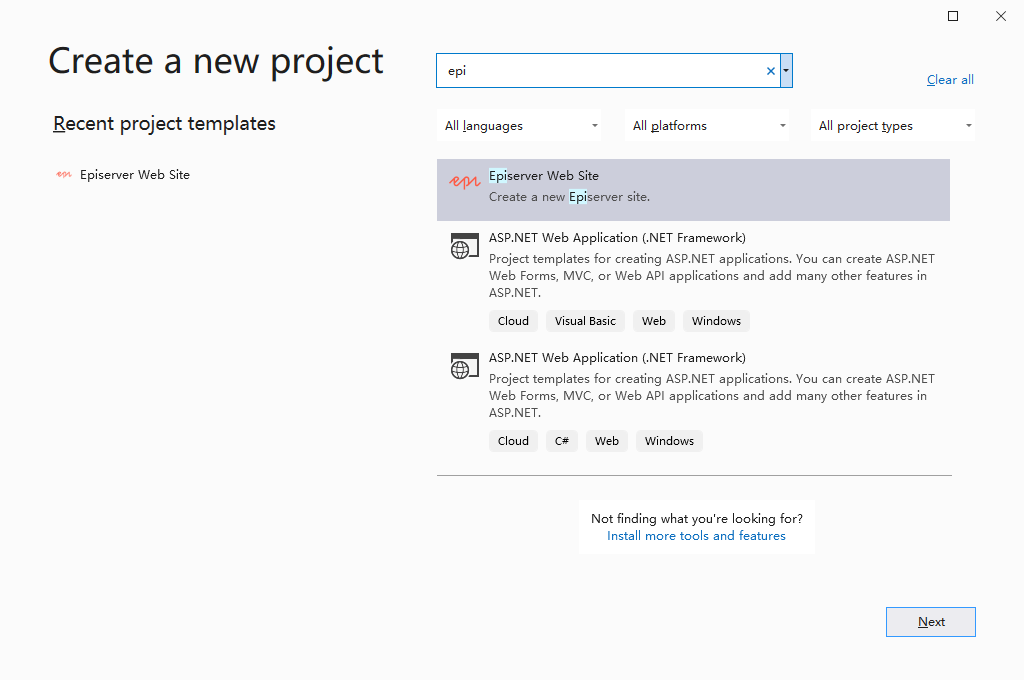
Then click “Next”, enter your project name, location etc.
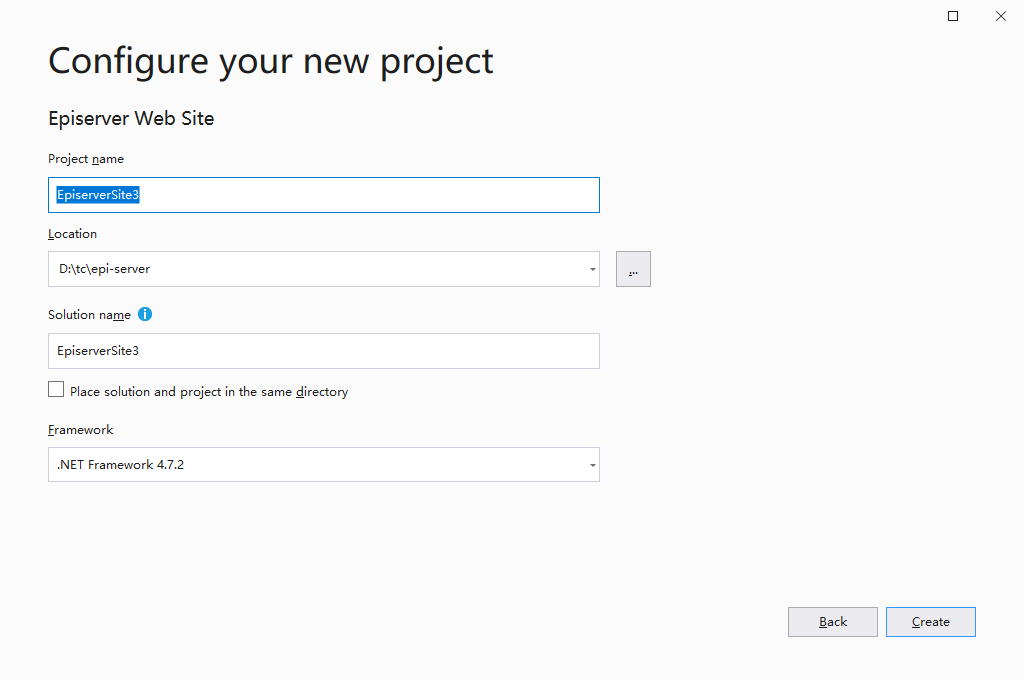
Click “Create”
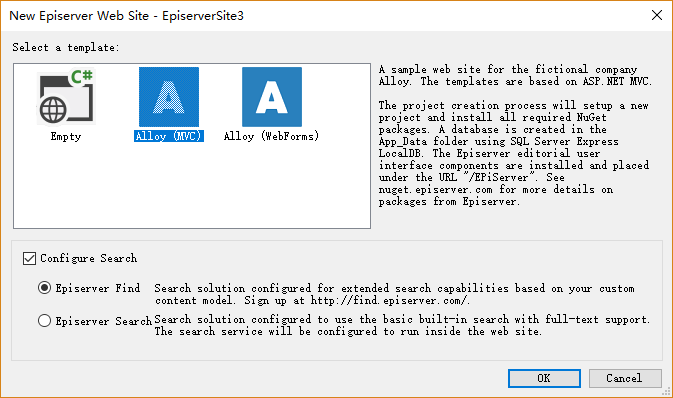
Select “Alloy (MVC)”, click “OK”.
Then the demo project is created.
Press F5 to run it, you will see
What you need to do is to follow the steps above and create a demo Alloy project. Then record a video to demonstrate that you can run the project successfully.
Visit http://localhost:63407/Register/ to create an administrator account (the port 63407 might be varying, depends on your local machine).

Press “Register” and you will create the administrator account and log in automatically.
If you want to log out, click the “logout” of Customer Zone in the footer, you can log in with the administration username/password.
2. Do basic editing for the sample site
Now let’s continue doing the basic editing for the sample site.
You need to implement the two following two tasks
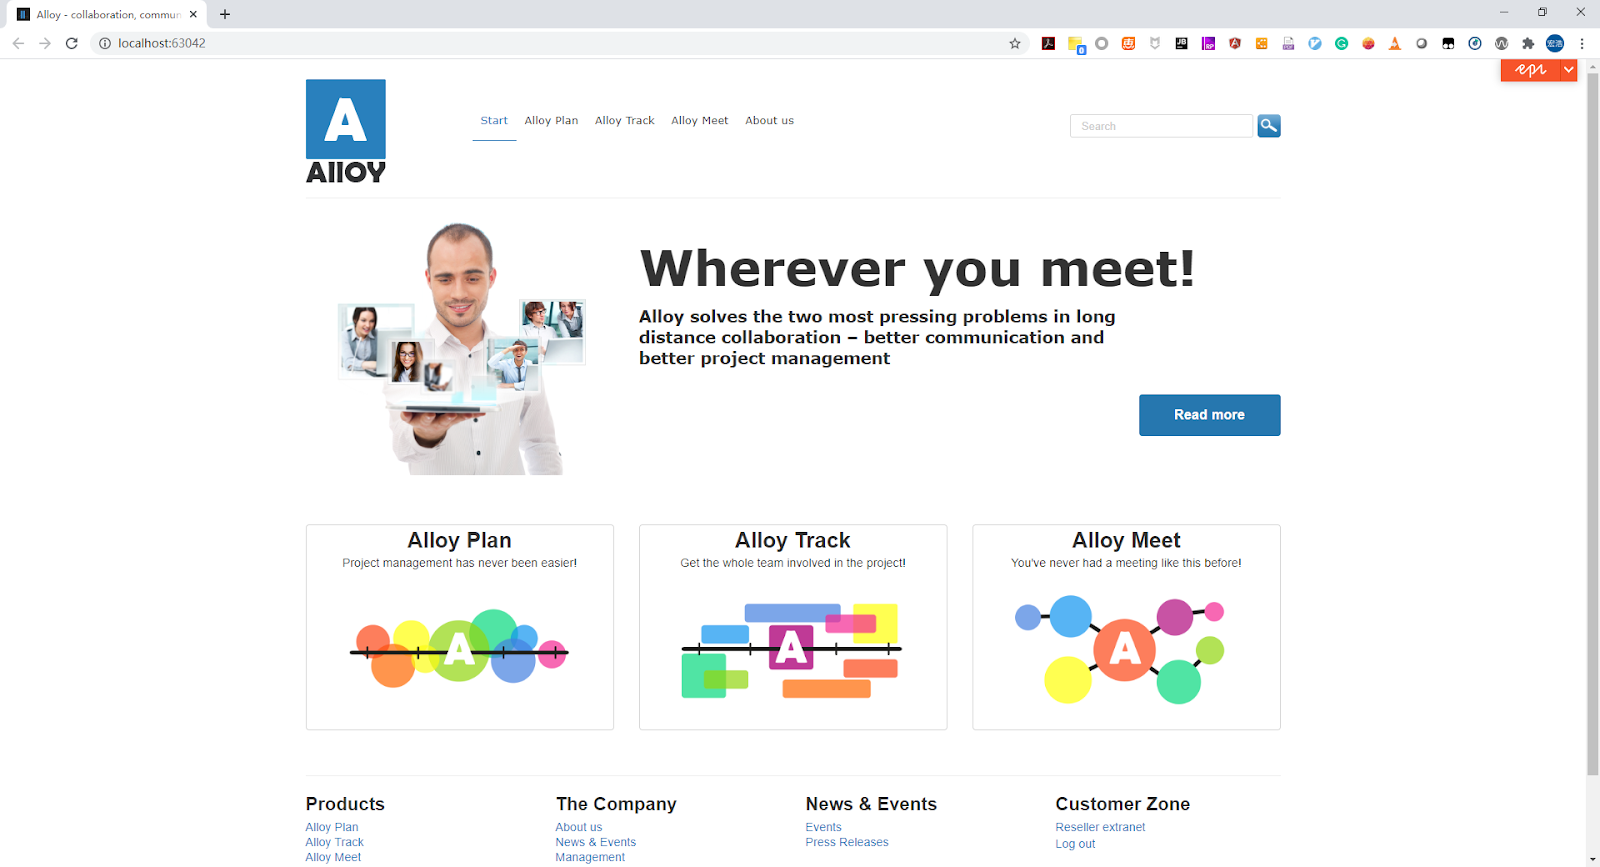
Task 1: Modify the home page of Alloy site
Change the order of “Alloy Plan”, “Alloy Task”, “Alloy Meet” to “Alloy Meet”, “Alloy Plan”, “Alloy Task”.
Change the description of “Alloy Meet” to “You've never had a meeting like this before! Topcoder is awesome”.
Add a new button “Alpha product” below, it will link to the new page you created in task 2.
Finally, the home page should look like

Task 2: Create a new page Alpha product, whose access requires authentication (login with admin). The new page should look like
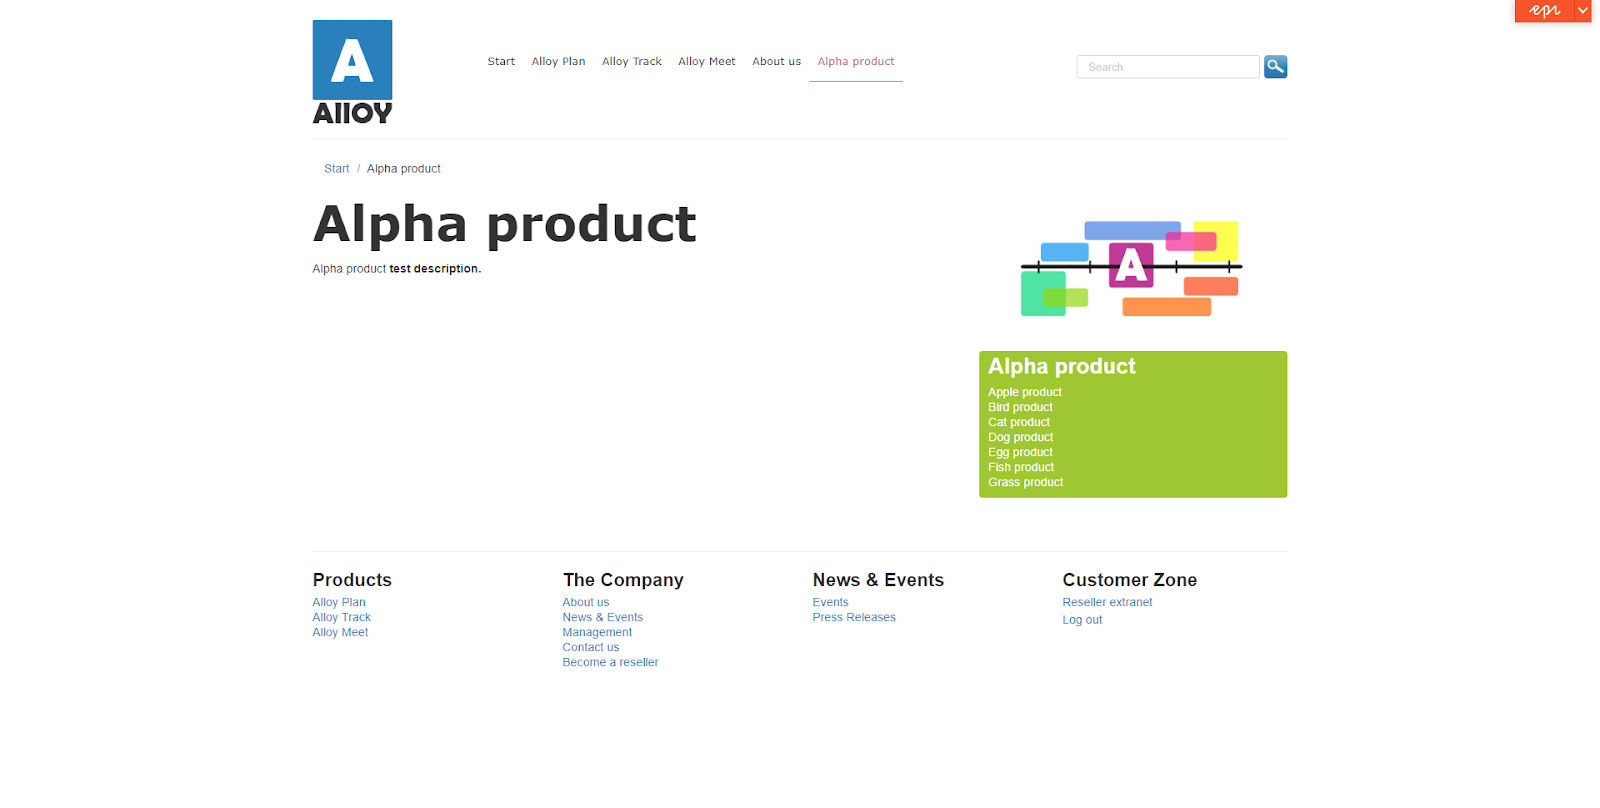
And for accessing the page, it requires to log in.
Resources for learning
Getting started guide: https://world.episerver.com/documentation/developer-guides/CMS/getting-started/
Final Submission Guidelines
Submit a zip archive, including
-
The video that shows your submission meets all the requirements above. Please upload your video elsewhere (like in Youtube, Google Drive, Dropbox etc) and share the link in your submission.
-
You don't need to include the source code of the sample site in your submission.