Challenge Overview
Challenge Objectives
-
Target environment: Chrome, Firefox, Edge latest version
-
Basic Requirements: Build the UI prototype for Robot Script UI Editor.
Project Background
RPA Framework is a collection of open-source libraries and tools for Robotic Process Automation (RPA), it can automate repetitive tasks by mimicking user behavior performed on Desktop and Web Applications in both Cloud and On-premise environments, and it is designed to be used with both Robot Framework and Python. To use RPA Framework, the user needs to write Robots script to define the tasks and steps in the automation process.
However, manually writing the Robot script is cumbersome. The goal of this project is to build an UI Editor for creating/editing/visualizing the Robot scripts, so that users are able to visualize all the workflows that are defined as robot scripts for bots to perform surface and object based automation accordingly.
Put In JSON file.
Technology Stack
-
Django
-
Any Javascript libraries which can be used standalone in Django like – Bootstrap, jQuery, vis.js etc. The libraries must be in Apache-2 or MIT license. Please ask for approval if you want to use libraries other than Bootstrap, jQuery or vis.js.
-
Python
-
RPA Framework
Design assets
The design assets (in XD formats) are provided in the forum.
Individual requirements
In this challenge, you need to implement the UI prototype for the entire script Editor, and the features of adding settings and tasks (by drag & drop), the other features like adding keywords, table-view are not in scope, the related designs are
-
0A Script Editor
-
0B Script Editor - Step 1 of 3
-
0C Script Editor - Edit Title
-
0D Script Editor - Libraries - List View
-
0E Script Editor - Libraries - Scrolled
-
0F Script Editor - Hover
-
0G Script Editor - Desktop.Windows - Drag
-
0H Script Editor - Desktop.Windows - Drop
-
0I Script Editor - Desktop.Windows - Drag
-
0J Script Editor - Desktop.Windows - Drag
-
0K Script Editor - Desktop.Windows - Drop
-
0L Script Editor - Robot Framework
-
0M Script Editor - Robot Framework - Drag
-
0N Script Editor - Robot Framework - Drop
-
1A Script Editor - Step 2 of 3
-
1B Script Editor - Robot Framework - Add Task
-
1C Script Editor - Robot Framework - Added Task
Here are some feature explanations.
1. Create a new script
We can create a new script by clicking on New button. Keep the other buttons “Table View”, “Load”, “Save” dummy for now. “Settings” button is not required
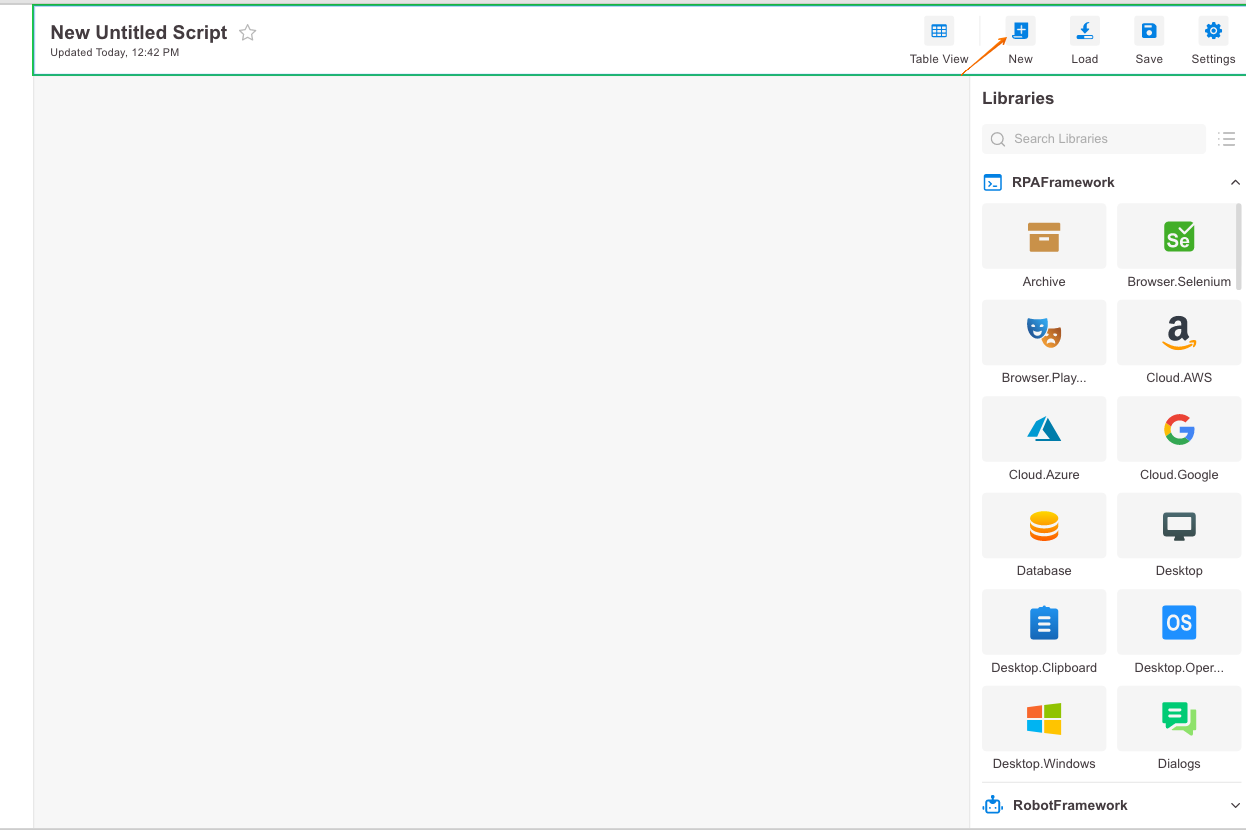
After creating a new script, all existing scripts will be removed. Always prompt a warning dialog before removing the scripts.

We can edit the script title by clicking on the title text

We need to show the date time of the last creation/update. When the script is newly created, show it as “Created <The date time>”, if the script is updated, show it as “Updated <The date time>”. Replace “<The date time>” with the actual date time.
2. Libraries
2.1 General features
It should include two sections: RPAFramework and RobotFramework. Each section is expandable and collapsible.
The search function should work, it should filter items in the expanded sections as soon as the user is typing.
Please make sure there is a dummy placeholder for the top panel and left panel.
The height of the entire page should fit the browser window, the items should be scrollable vertically.
The items can be shown in the Tile view or the List view, switchable by clicking on the

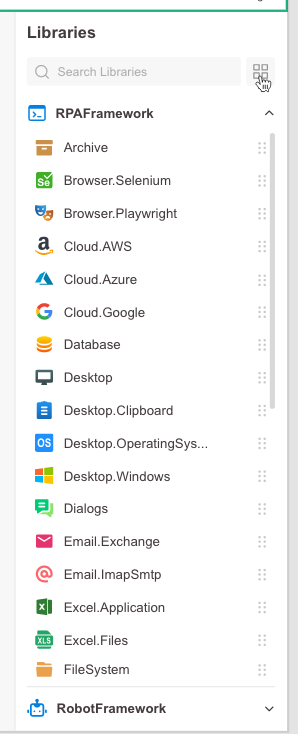
While hovering the item, it should show the tips as below.
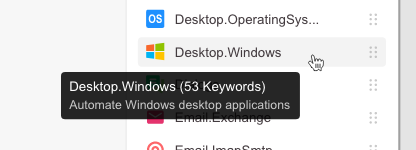
2.2 RPAFramework
You can get the libraries of RPAFramework from https://rpaframework.org/#libraries, all the listed libraries are in scope, these libraries should be configured in a JSON file, which includes the following items. The orders of the items are the same as the array order in the JSON file.
{
...
[
"name": "Desktop.Windows",
"icon": "/i/windows.svg",
"tips": "Automate Windows desktop applications"
],
...
[
"name": "Cloud.AWS",
"icon": "/i/aws.svg",
"tips": "Use Amazon AWS services"
]
...
}

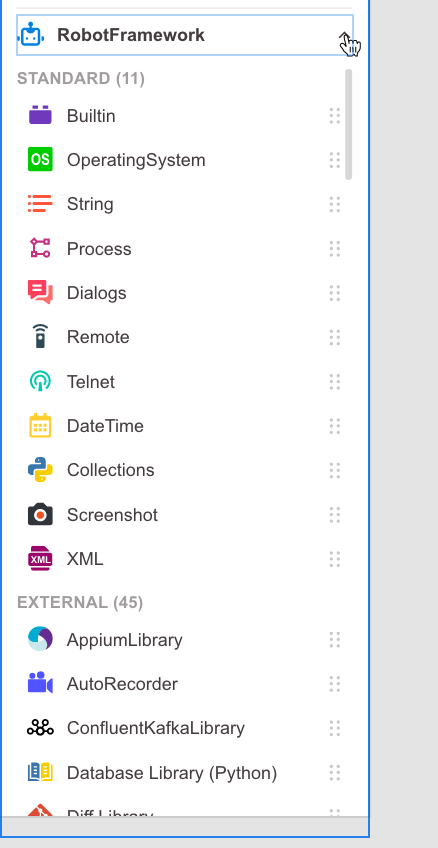
2.3 RobotFramework
You can get the libraries of RPAFramework from https://robotframework.org/#libraries, there are curated as three categories: Standard, External, Other. All the listed libraries are in scope, these libraries should be configured in a JSON file, which includes the following items. The orders of the items are the same as the array order in the JSON file.
{
"standard":
[
"name": "Builtin",
"icon": "/i/builtin.svg",
"tips": "Provides a set of often needed generic keywords. Always automatically available without imports."
],
...
[
"name": "OperatingSystem",
"icon": "/i/operatingsystem.svg",
"tips": "Enables various operating system related tasks to be performed in the system where Robot Framework is running."
]
...
},
"external":
[
"name": "AppiumLibrary",
"icon": "/i/appiumlibrary.svg",
"tips": "Library for Android and iOS testing. It uses Appium internally."
],
...
[
"name": "AutoRecorder",
"icon": "/i/autorecorder.svg",
"tips": "Library which allows to automatically record video for test/suites execution."
]
...
},
"other":
[
"name": "Creating test libraries",
"icon": "/i/creatingtestlibraries.svg",
"tips": "Creating test libraries section in Robot Framework User Guide.."
],
...
[
"name": "plone.app.robotframework",
"icon": "/i/plone.app.robotframework.svg",
"tips": "Provides resources and tools for writing functional Selenium tests for Plone CMS and its add-ons."
]
...
}
}
3. Add libraries
We can add libraries by dragging and dropping the item, after a library is added, it should contain a button to add a task. We can add multiple libraries and they are stacked.
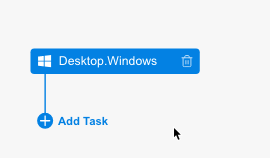
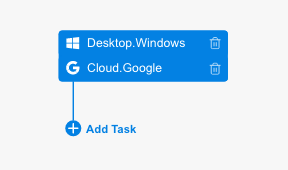
The library node is blue.
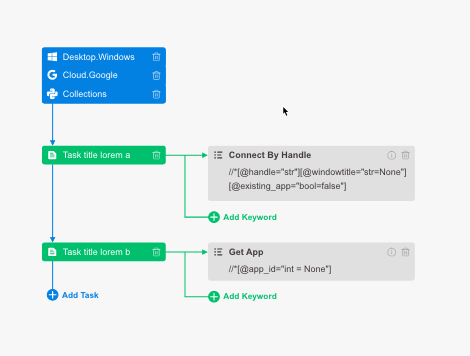
4. Add tasks
Clicking on the “Add task” button, then a task node is created, the task node is green. We can type the task title inside the node.
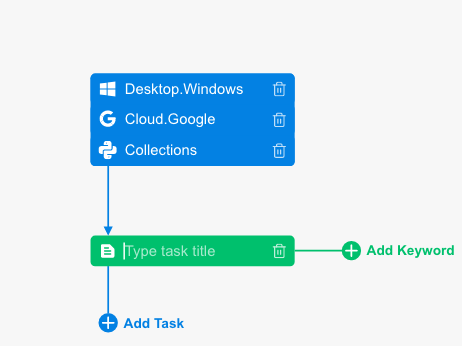
Each task node associates an “Add Keyword” button, keep the button dummy for now.
We can add multiple task nodes.
Important notes
The robot script UI Editor should be a single page application, the page should be responsive - adapt to the different screen size of Browser window. The minimum width is 1024px.
The UI should follow the design strictly.
There are many details in the UI Editor, please ask questions in the forum if you have any doubts, please don’t make assumptions without approval. Any assumption without approval will be unacceptable.
Final Submission Guidelines
Please submit the following items in a zip archive.
- The full source code of the Prototype of the UI Editor.
- A detailed README.md to show how to deploy and run your application.
- A video to verify your submission meets all requirements. You don’t have to speak while recording the video.