October 13, 2022
Android: ArrayAdapter

The adapter is a bridge between the User Interface (UI) component and the data source. It converts data from data sources into view items that can display the data in different ways like a listview, gridview, spinner, etc.
When we have a list of a single type of item that is backed by an array, we can use ArrayAdapter. For instance, if we have a list of phone contacts, countries, or names, then we can use ArrayAdapter. It is a simple and commonly used adapter in Android.

By default ArrayAdapter is a layout with a single TextView. When we want to use a more complex view, when more customization in grid items or list items is needed, then we need to avoid ArrayAdapter and use CustomAdapter in its place.
Syntax:
1
ArrayAdapter(Context context, int resource, int textViewResourceId, T[] objects)
This is an implementation of BaseAdapter for if we need to create a custom list view or a grid view. First we have to create our own custom adapter and extend ArrayAdapter in that custom class.
Parameters:
These are parameters in ArrayAdapter.
Context
This is the first parameter, used to pass the current context. This value cannot be null. We can also use getApplication(), and getActivity() in the place of ‘this’ keyword. The getApplication() method is used in an Activity and getActivtiy() method is used in a fragment.
Example:
1
ArrayAdapter context = new ArrayAdapter(this, int resource, int textViewResourceId, T[] objects);
Resource
This second parameter is the resource ID that is used to set the layout file, which contains the layout needed to be used when instantiating views.
Example:
1ArrayAdapter resource = new ArrayAdapter(this, R.layout.list_view_items, int textViewResourceId, T[] objects);
textViewResourceId
This parameter is used to set the ID of TextView where we want to display our content.
Example:
1
ArrayAdapter textviewresourceld = new ArrayAdapter(this, R.layout.list_view_items, R.id.textView, T[] objects);
Objects
This is the fourth parameter, which is an array of objects. It is used to set the array of elements in the TextView. This value cannot be null.
Example:
1
2
3
4
5
6
7
String courseList[] = {
  "Java",
  "Operating System",
  "CompilerDesign",
  "Android Development"
};
ArrayAdapter arrayAdapter = new ArrayAdapter(this, R.layout.list_view_items, R.id.textView, courseList[]);
Example
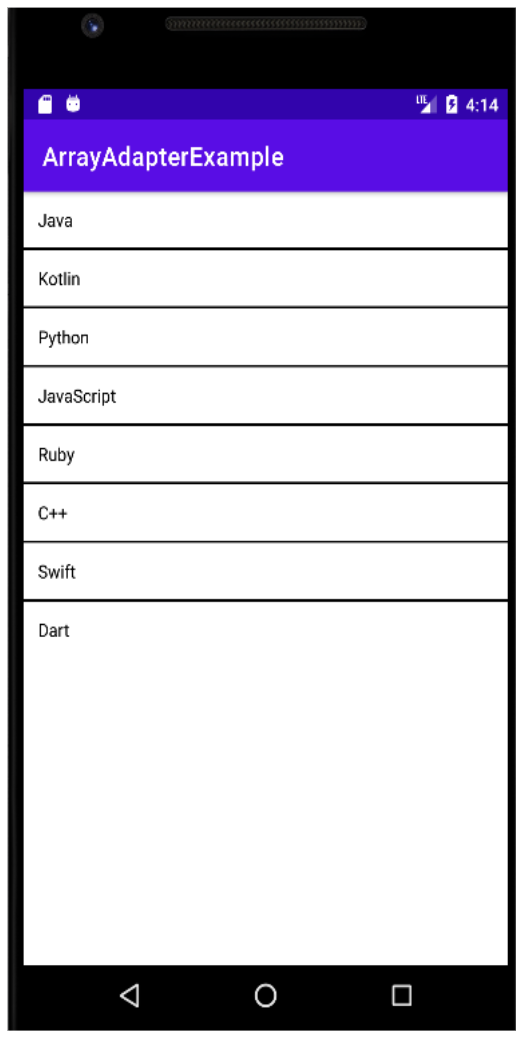
In this example, we will display a list of course names in a listview using a simple array adapter.
Step 1: First we need to create a new project in the Android Studio.
Step 2: Design the UI
Now we need to create a display view in the activty_main.xml. In this file, we will design the ListView and add the following code to it:
activity_main.xml
1 2 3 4 5 6 7 8 9 10 11 12 13 14 15<?xml version="1.0" encoding="utf-8"?> <RelativeLayout xmlns:android="http://schemas.android.com/apk/res/android" xmlns:app="http://schemas.android.com/apk/res-auto" xmlns:tools="http://schemas.android.com/tools" android:layout_width="match_parent" android:layout_height="match_parent" android:orientation="vertical" tools:context=".MainActivity"> <ListView android:id="@+id/simpleListView" android:layout_width="match_parent" android:layout_height="wrap_content" android:divider="#000" android:dividerHeight="2dp"/> </RelativeLayout>
Step 3: Design a new layout file
Now we need to design another layout file for the listview item. In this, we will add TextView for the list items.
list_item.xml
1 2 3 4 5 6 7 8 9 10 11 12 13 14<?xml version="1.0" encoding="utf-8"?> <LinearLayout xmlns:android="http://schemas.android.com/apk/res/android" android:orientation="vertical" android:layout_width="match_parent" android:layout_height="match_parent"> <TextView android:id="@+id/textView" android:layout_width="fill_parent" android:layout_height="wrap_content" android:layout_gravity="center" android:padding="12dp" android:textColor="#000" /> </LinearLayout>
Step 4: Now we will open the MainActivity.java and add the below code in it.
1
2
3
4
5
6
7
8
9
10
11
12
13
14
15
16
17
18
19
20
21
22
23
24
25
26
27
28
29
30
package com.example.arrayadapter;
import androidx.appcompat.app.AppCompatActivity;
import android.os.Bundle;
import android.widget.ArrayAdapter;
import android.widget.ListView;
import java.util.List;

public class MainActivity extends AppCompatActivity {
  ListView simpleList;
  String courseList[] = {
    "Java",
    "Kotlin",
    "Python",
    "JavaScript",
    "Ruby",
    "C++",
    "Swift",
    "Dart"
  };
  @Override
  protected void onCreate(Bundle savedInstanceState) {
    super.onCreate(savedInstanceState);
    setContentView(R.layout.activity_main);

    simpleList = (ListView) findViewById(R.id.simpleListView);
    ArrayAdapter < String > arrayAdapter = new ArrayAdapter < String >
      (this, R.layout.list_item, R.id.textView, courseList);
    simpleList.setAdapter(arrayAdapter);
  }
}
Output
