January 25, 2021
Simple Tricks In Adobe XD To Speed Up Your Design Process

DURATION
20mincategories
Tags
share
When creating UI design, especially in a complex layout, we might need to repeat some design elements quite often, such as lists and cards. In order to make the design feel alive, we also need to change the content data (text, images, etc) inside these repeated patterns and not just use the same placeholder content. In Adobe XD there is a feature that can be used to perform repetition of design components. This feature can quickly duplicate components vertically and horizontally and is known as the “Repeat Grid”.
The repeat grid tool is faster compared to the usual copy and paste method. But, after using this tool, all the duplicated design elements will have the same content data. We need to change the data to make the design represent a real life/production design and make it more visually interesting. Using the repeat grid tool, we can mass import the data in one single drag and drop trick, instead of changing it piece by piece. Based on my experience, the text and images can be imported using these drag and drop tricks. In this tutorial, I will share how to use a repeat grid to import the data content faster. We will practice this technique by creating a calendar design and tri-fold brochure.
Create Easy and Simple Calendar Designs
First Step - Prepare the Content
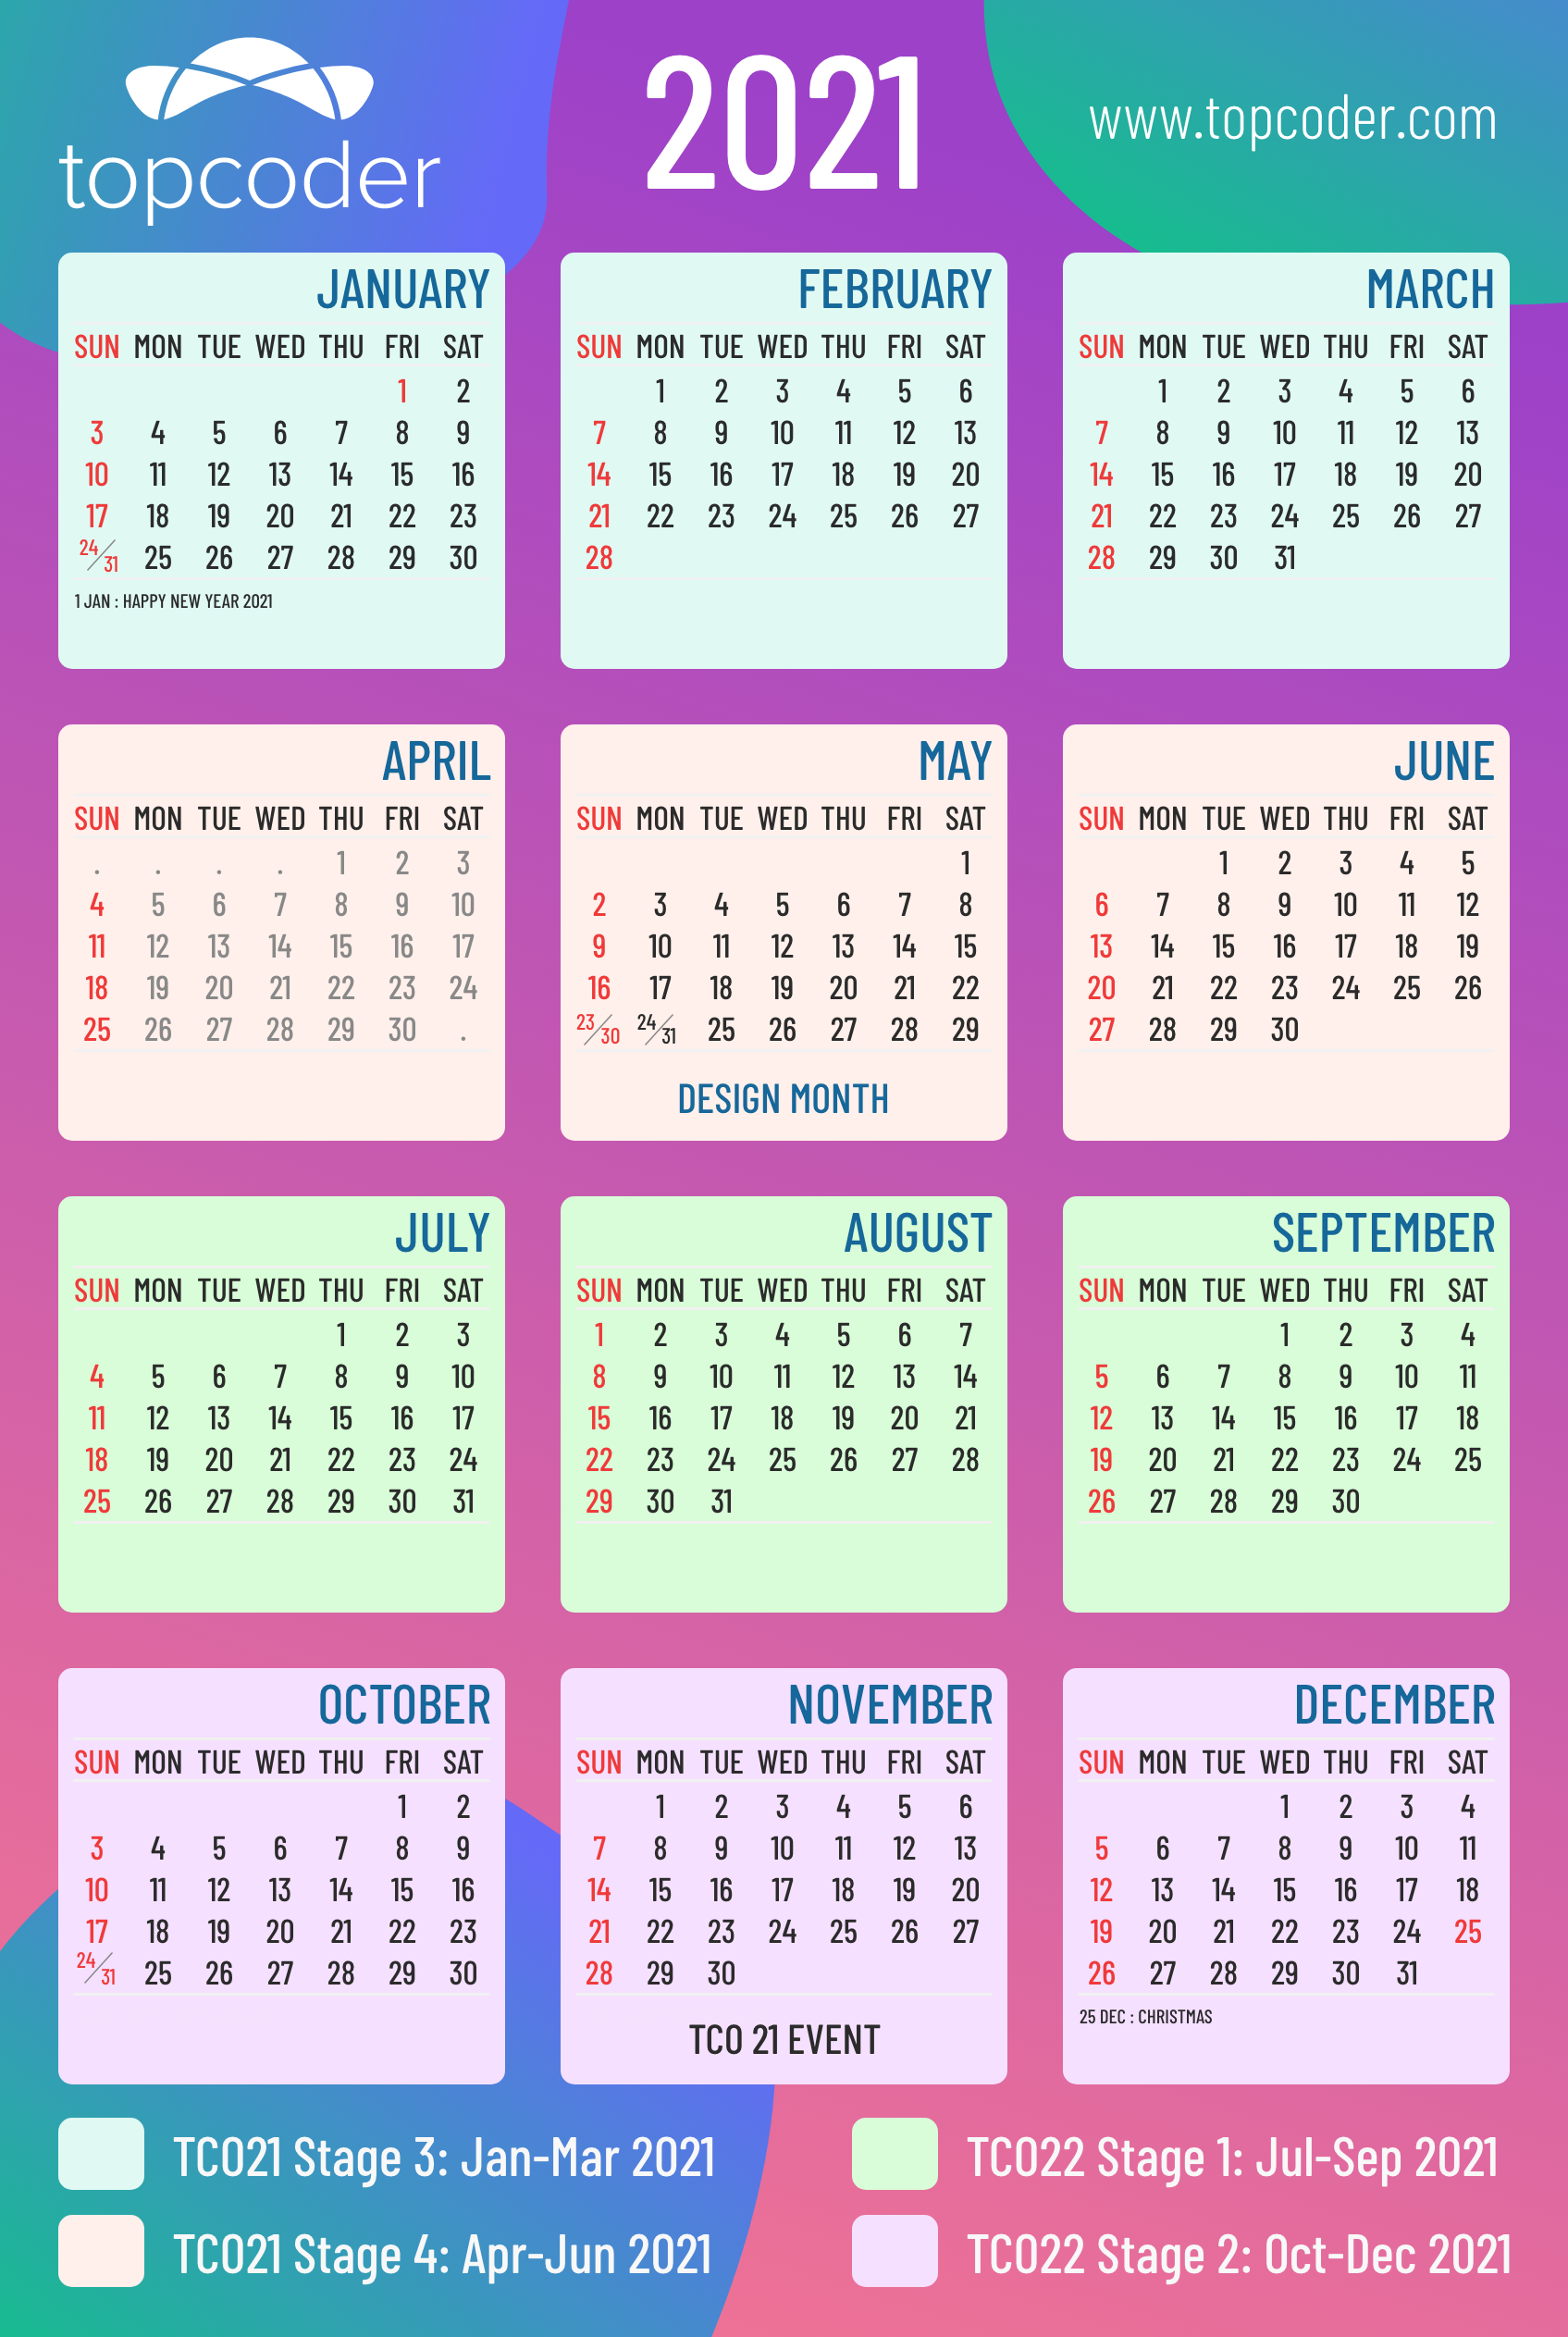
To create the calendar design, first, we need to prepare some files containing necessary data. You can prepare full data for one month, with the date, name of the day, and month name saved in a txt file or your favourite format for the text processor. I’ve prepared the data using Google Sheets and converted it to a .txt file. You can download Google Sheets here, open it, and copy-paste it into a .txt file.
In this tutorial, we will use the Barlow and Barlow Condensed fonts that can be downloaded for free in Google Fonts. You can use another font in your calendar design if you choose.
Second Step - Create a New Artboard
We will create the calendar in A4 paper size. Create a new file in Adobe XD with size 565 pixels width and 842 pixels length, portrait format. The calendar design will be a three by four-month layout concept. We use the grid system to create the layout guide with three columns with 161-pixel width, 20-pixels gutter width, and 21-pixel left-right margin.
To see how to create a new Adobe XD file and make the grid, watch the video below
Third Step - Creating The Month Design Component
Create a rectangle as the background with size 61-pixel width, 150-pixel height, set the rectangle color to #F8F8F8 HEX code.
Add text for month name in the top-right corner, font Barlow Condensed, size 20, Medium, and color HEX code is #888888.
Add a line under the month name, 150-pixel length, 1-pixel border size, color HEX code is #F1F1F1. Copy the month name, put under the line, resize to 12.
Repeat grid this text into seven items that will be used as the name of days with the first three letters. Hold the Shift + Alt keys to copy the line again and drag it under the day name text.
Now, copy the day name text under the line, continue the repeat grid up to five rows that will be the date design. Don’t forget to set the text in center-line format.
Again, hold the Shift + Alt keys to copy the line and drag it under the date. Copy the name of the month below the line, resize it to 10. That will be the description of the special date or holiday every month.
Change the day name text by dragging the .txt file into the first text of it. Bump, and the name day will change automatically. Do the same step with the date, drag the .txt file into the first of the date text group.
To see how to create one calendar month, watch the video below.
Please note that the “31 January 2021” date does not appear. It places it in the sixth row of the date design. We will modify this manually.
Fourth Step - Duplicate the Month Design Component
Now, we will duplicate the one calendar month design into twelve months:
Group all the January design components into one group, renamed as Jan21.
Duplicate the Jan21 group using the repeat grid into three columns and four rows.
Change the month name by dragging and dropping the .txt file.
Change the date design on each month by dragging and dropping the .txt file.
Modify the description date of each month, and join the date that is placed in sixth-rows.
To see how to duplicate one calendar month into twelve months and edit the components inside, watch the video below.
The initial design of the calendar has been completed for one year.
Fifth Step - Decorate the Calendar
To make the calendar design more attractive, you may decorate it by modifying the background, adding logos, images, illustrations, or other components into the calendar. I have decorated the design using the Topcoder GUI Kit. Watch the video below for details.

You can download the Adobe XD file and png file as well in this link.
Designing a Tri-Fold Brochure with a Simple Technique
Once you are finished with the calendar tutorial, next, we will continue to practice this repeat grid technique by importing text and images to design a trifold brochure of Topcoder Open 21 Events. As a note, this brochure is not officially for Topcoder Open 21 events, only for practice purposes.
First Step - Create New Artboard
We will use all the data, images and texts on the Topcoder 21 website here. In the same file of calendar design, create a new artboard in Adobe XD with the size 842 pixels width and 565 pixels length, landscape format. Divide the artboard into three parts using the grid. For each part we add a background using a grey colored (#888888) rectangle, add difference transparent 23%, and 10%.
Second Step - Let’s Start Designing (Part 1)
In this step we will create the TCO title and two types of events; TCO onsite competition and TCO regional event:
First, we copy the text data from calendar design to create the brochure title, 2021 Topcoder Open, and tagline. Download the TCO21 and Topcoder logos, and insert into our design by drag and drop, arranging them to the center of part one.
Create a rectangle for the image of the event type, copy the text, then group these two components.
Using repeat grid tools, duplicate the component group two times horizontally and go right.
Select the rectangle in the first group, choose the images that we want to insert, then drag and drop into the rectangle.
Change the text of the event title by copy-pasting from the TCO21 website.

Part one of tri-fold brochure
Third Step - Continue to Design (Part 2)
In this part, we will create the competition overview with six types of competitions. Each competition type has an icon, title, and description.
We copy the text data from part one to create the competition subtitle and description.
To create the subtitle of competition types, duplicate these texts by holding the Alt key, drag and drop the text.
Add the rectangle for the icon, group these three components. Using repeat grid tools, duplicate the component group six times, and vertically go down. Adjust the distance between groups to make the design more engaging.
To import the title text, select the text in the first group, drag the .txt file into it. We do the same technique to insert the description text.
To insert the icon , select the rectangle in the first group, choose the icons that we want to insert, drag and drop it into the rectangle. The icon can be bulk imported for image format (.png/.jpeg). Meanwhile, for icons in the form of SVG files, we can’t do the bulk import trick with drag and drop, we have to replace them one by one.

Part two of tri-fold brochure
Fourth Step - Last Steps of Design (Part 3)
In this third part we will create sub-information about TCO21; How to compete, Prize, and Win a Trip:
Copy the component group from part one, adjust the title and image position, copy the description text from the part two also.
Group these three components, and repeat three times, and vertically go down.
To import the title text, select the text in the first group, drag the .txt file into it. We do the same technique to insert the description text.
To insert the image, select the rectangle in the first group, choose the images that we want to insert, drag and drop them into the rectangle.
There are three sub-subjects below the Win A trip section. We can duplicate and import these images and texts with the same technique.

Part three of tri-fold brochure
Fifth Step - Decorate the Brochure as you Wish
To make the brochure design more attractive, you may decorate its design by modifying the background using gradient color. We can copy the gradient color from the calendar using the copy appearance technique. Select the object, click Ctrl+C to copy, select the object that we want to paste, click Alt+Cmd+V (macOS) to paste the appearance of the object. Make final touches as you wish.
To see the whole design process using these repeat grid tools, watch the video below.
By using the tricks of repeat grid tools, mass importing text, and image data technique, it will help your design feel alive and more interactive visually, as well as speed up your design time.